Our job is to take what you see on your computer screen and push it through a printer and put it on paper. To do this successfully requires that your artwork be formatted properly for print!
If we ask if your artwork is “print-ready,” that means we want to know that your file has been saved, sized, designed, and formatted in preparation for printing. Just because a design file looks great on-screen doesn’t mean it’s print-ready. This article will help you get, “print-ready.”
File formatting
Format refers to the size, resolution, color mode, and fonts in your design file. Each of these formatting elements needs to be prepared properly to ensure your file will print properly.
1. Art board/canvas size should match finish size
The file that you send us should be sized AT the size you want it printed. For example, if you want a 36-inch by 60-inch lawn sign, your art file’s artboard or canvas needs to be 36 inches x 60 inches. If your artwork has bleeds (art elements extend beyond the trim line), then your art file should be 1/4-inch longer and wider … so 36 1/4 x 60 1/4 inches.

2. Set resolution to 300 dpi
Resolution refers to the number of ink dots that are deposited per square inch. This is measured by DPI (dots per inch) for printed materials and (PPI) pixels per inch for computer screen art.
On your screen, graphics appear fine at 72 PPI. These images, however, will look pixelated or blurry when they’re printed. Any artwork that you want printed, should be set at 300 PPI or DPI.
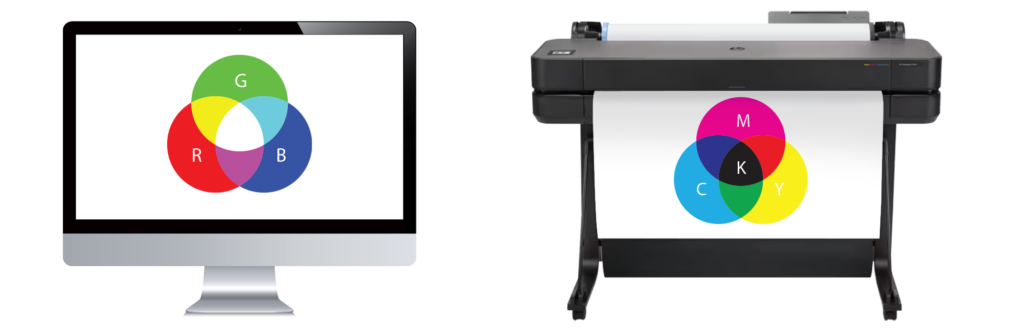
3. Set color mode to CMYK
Your computer uses a color model of RGB (red/green/blue) to interpret and display color. Artwork displayed on a screen is also backlit … making everything look more vibrant. Printers use a CMYK color model. Cyan, magenta, yellow, and key (black) inks are combined to create all colors. Make sure your design files are saved with the CYMK color model before printing. This is the best way to ensure that your on-screen colors are as close as possible to your printed colors.
4. Outline your fonts
Before you send us your design file, you should outline any fonts that appear in your design. Why? Because there are a billion fonts out there, and chances are we don’t have your same fonts installed on our machines. When you outline your fonts, it changes your fonts into shapes … and then we can print your desired text exactly.
CAUTION: Once you outline your fonts, you can’t edit your text anymore! We recommend the following workflow/steps: (1) Run a proper grammar and spellcheck, (2) save your art file (3) outline your fonts (4) SAVE AS or EXPORT as a PDF (5) close your art file WITHOUT SAVING changes. This will ensure that your original art file’s fonts are still editable.
File type
File type refers to the application that MADE the file. For example, a file made in Photoshop will be saved as a filename.psd file. inkr Printing accepts the following files types: PDF, EPS, TIF, JPG, and PSD. PDF is, by far, the most preferred.


Design Considerations
Here are some things that you’ll want to keep in mind as you design and prepare your artwork for printing: bleeds, cut lines, crop marks, and safety zones.
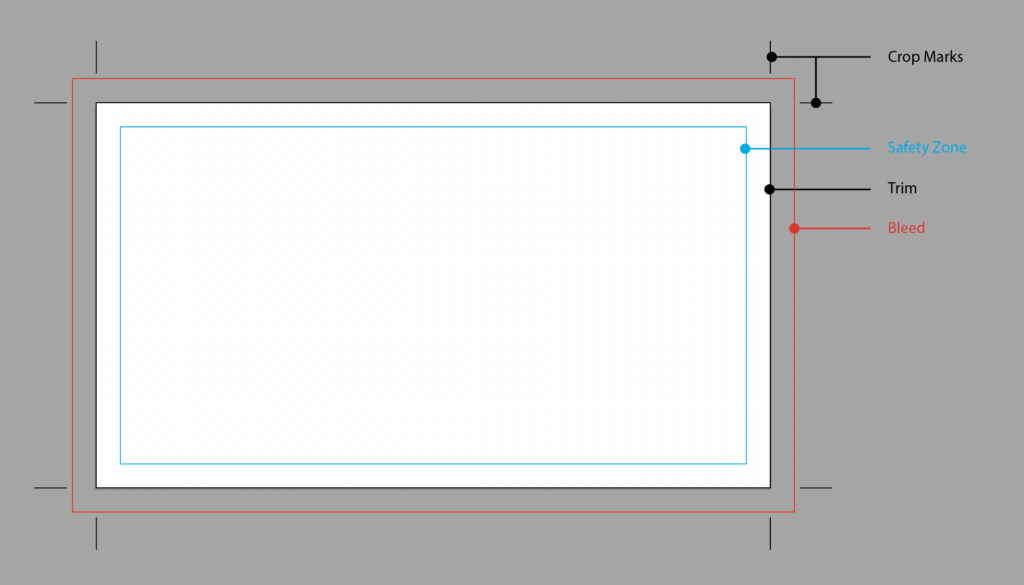
Bleeds
If you want your artwork to go all the way to the edge, you need to add a bleed. Your bleed should be 1/8 inch beyond the finish size (trim size) of each side of your artwork (add 1/4 to length and width of your art).
Crop Marks
You must include crop marks in your design file so the printer cuts your print correctly. These marks are thin lines that indicate where the printer should trim the print.
Safety Zones
Any critical images or text that you don’t want cut must be placed at least 1/8 inch from the trim edge. That way, you can be certain that important images or text are not cut off.